
Lounea WiFi – Info & Instructions
Lounea WiFi – enjoy a worry-free digital life! With these simple instructions, you can connect your routers, set up the network, and start using your WiFi.
Installation Instructions
Download the TP-Link Aginet app from your app store. The app will guide you through the setup process.
Apple App Store | Google Play
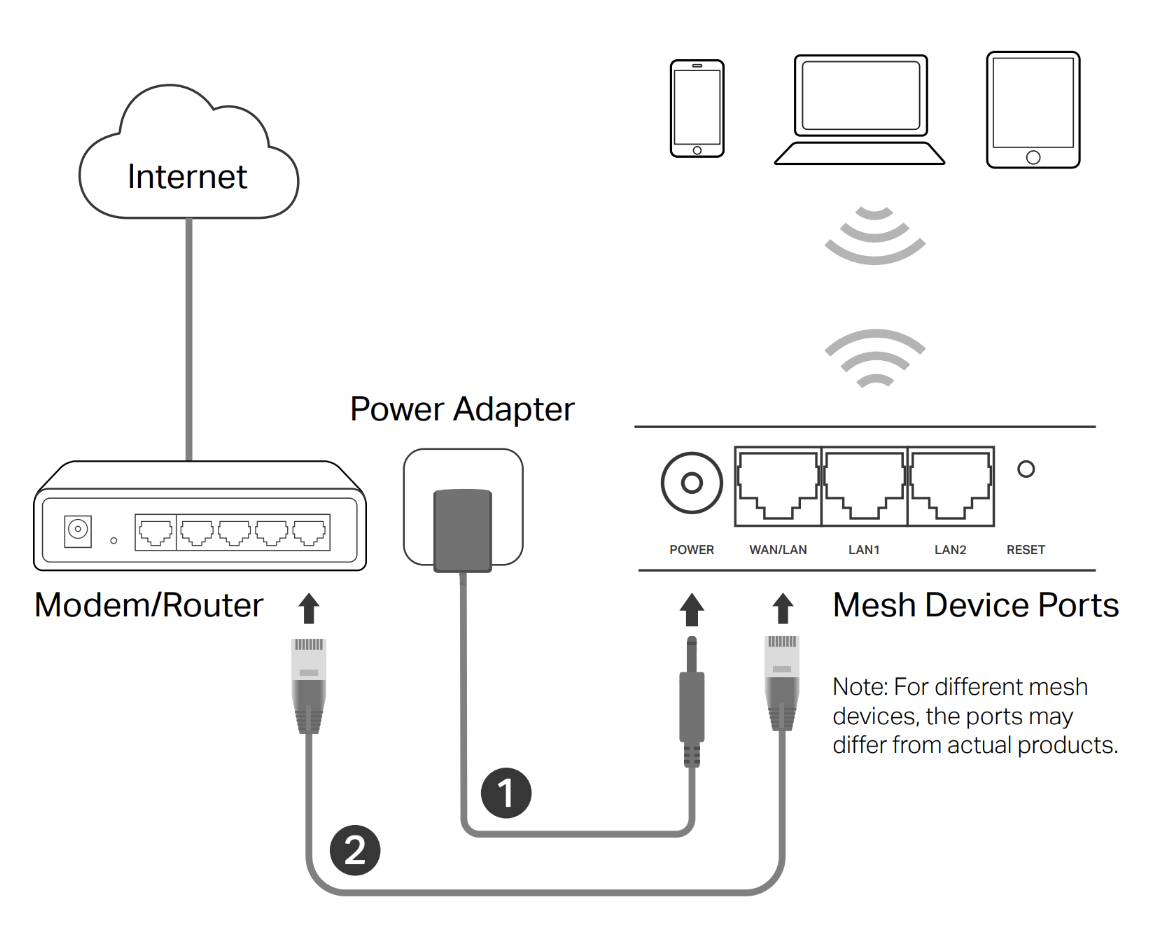
Installation Instructions for Connecting the Router
- Connect the power adapter to the mesh device.
- Use an Ethernet cable to connect the WAN/LAN port of the mesh device to the Ethernet port of your modem/router.
- Ensure that the status LED light is blinking blue before proceeding with the setup.
Method 1 – Network Setup via the App (Recommended)
- Download the TP-Link Aginet App
You can easily set up and manage your network using the TP-Link Aginet app. Search for "TP-Link Aginet" in the Apple App Store or Google Play, or scan the QR code below. Download and install the TP-Link Aginet app.
- Open the TP-Link Aginet App and Sign in with Your TP-Link ID
Note: This step is optional. If you don’t have an account, you can create a TP-Link ID or simply manage your device without one. However, to access the full range of TP-Link services, link your TP-Link ID to your mesh device.
- Set Up the Network
Tap "Create Network" in the TP-Link Aginet app and select "Connect via Ethernet Cable." Complete the installation and connect to the internet. Once you have set up the first device, you can add more endpoints to expand your WiFi coverage.
Method 2 – Network Setup via Web Browser
- Connect Your Computer or Mobile Device to the Network
You can connect wirelessly or using an Ethernet cable. The default wireless network name (SSID) and password can be found on the product label at the bottom of the device.
- Open a Web Browser and Access the Setup Page
Open a web browser and enter tplinkwifi.net in the address bar. Create a password and log in to the device.
Note: If the login page does not appear, refer to the "Troubleshooting" section.
- Follow the Setup Instructions
Follow the on-screen instructions to complete the network setup.
Method 3 – Network Setup Without Additional Devices
- Connect the Power Adapter
Plug the power adapter into your Lounea WiFi device.
- Connect the Ethernet Cable
Use the provided Ethernet cable to connect the WAN/LAN port of the Lounea WiFi device to the Ethernet port of your fiber terminal, modem, or router.
- Wait for the Device to Start
The Lounea WiFi device will power on. Wait until the status light turns white.
- Connect to the Wireless Network
Lounea WiFi is now ready for use. You can connect your device to the wireless network using the default SSID and password found on the bottom of the device.
- Expand Your WiFi Coverage
You can extend your wireless network with one or more additional Lounea WiFi devices. Simply power on the additional device and press the WPS button on it.

Indicator Light Meanings
| LED | DEVICE STATUS |
|---|---|
| Flashing Yellow | The device is starting up or resetting. |
| Yellow | The device connection quality is normal. |
| Flashing Blue | The device is ready for setup. |
| Flashing Blue Quickly | The device is establishing a WPS or mesh connection. |
| Blue | The device is set up, but there is no internet connection. |
| Flashing White/Green | The device is updating its firmware. |
| White/Green | The device is set up and connected to the internet. |
| Flashing Red | The device connection is lost. |
| Red | There is a problem with the device. |
Troubleshooting
1. What to do if you cannot access the TP-Link WiFi web management page?
- If your computer is set to use a static IP address, change the settings to obtain an IP address automatically.
- Ensure that http://tplinkwifi.net is correctly entered in the browser’s address bar.
- Try using a different web browser and attempt again.
- Restart the device and try accessing the management page.
- Disable the network adapter and then re-enable it.
2. Mesh Device LED Light is Flashing Red
- Place the mesh device closer to another configured mesh device until the LED light turns blue or green, then move it to its intended location.
- Refer to Question 4 and reset the mesh device to factory settings. Re-add the mesh device to the network using the TP-Link Aginet app or a web browser.
3. Unable to Access the Internet
- Check if your internet connection is working by connecting a computer directly to the terminal device or router using an Ethernet cable. If there is no connection, contact your Internet Service Provider (ISP).
- In router mode, log in to the mesh device’s management page and go to the Status page to check if the IP address is valid. If it is, run Quick Setup again. If not, check your hardware connections.
- Restart the device and try again.
4. How to Reset the Device to Factory Settings?
- While the device is powered on, press and hold the RESET button for at least five seconds, then release it.
- Log in to the web management page of the device, go to System Tools → Backup & Restore, and click Factory Restore. The device will reset and restart automatically.
5. What Should I Do If I Forget the Web Management Page Password?
- Refer to Question 4 and reset the device to factory settings. After the reset, you can create a new password.
6. What Should I Do If I Forget the Wireless Network Password?
- If you haven't changed the default wireless password, you can find it on the product label at the bottom of the mesh device.
Connect your computer to the mesh device using an Ethernet cable. Log in to the web management page, go to Basic → Wireless, and reset the wireless password.
Safety Instructions, Recycling, and Usage Restrictions
Safety Instructions
- Keep the device away from water, fire, moisture, and high-temperature environments.
- Do not attempt to disassemble, repair, or modify the device yourself. If you need assistance, please contact us.
- Do not use the device in locations where wireless devices are not allowed.
- Do not use a damaged charger or USB cable to charge the device.
- Only use the recommended chargers.
- The adapter should be installed close to the device and remain easily accessible.
- Operating temperature: 0℃–40℃.
- Please read and follow these safety instructions when using the device. We cannot guarantee the prevention of accidents or damage caused by improper use. Use the product carefully and at your own risk.
EU Declaration of Conformity
- TP-Link hereby declares that this device complies with the essential requirements and other relevant provisions of Directives 2014/53/EU, 2009/125/EC, 2011/65/EU, and (EU) 2015/863. (See Tukes and the EU for more details.)
The original EU Declaration of Conformity can be found at: https://www.tp-link.com/en/support/ce/
Operating Frequency / Maximum Output Power:
- 2400 MHz – 2483.5 MHz / 20 dBm
- 5150 MHz – 5250 MHz (indoor use only) / 23 dBm
- 5250 MHz – 5350 MHz (indoor use only) / 23 dBm
- 5470 MHz – 5725 MHz / 30 dBm
- 6105 MHz – 6425 MHz (indoor use only) / 23 dBm
Note: In EU member states, EFTA countries, and Northern Ireland, operation in the 5150 MHz – 5350 MHz and 6105 MHz – 6425 MHz frequency bands is restricted to indoor use only.
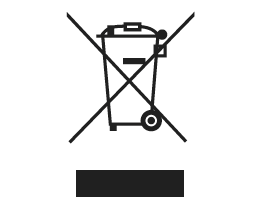
European Union – Disposal and Recycling Information
The symbol below indicates that, according to local regulations, this product and/or its battery must be disposed of separately from household waste.
When this product reaches the end of its lifespan, take it to a designated recycling center as instructed by local authorities.
Separate collection of the product and/or its battery during disposal helps conserve natural resources and supports environmental sustainability.
GNU General Public License Notice
This product may include software code developed by third parties, including software covered under the GNU General Public License (GPL).
Upon request, TP-Link (referring to the TP-Link entity responsible for providing the software for download or distributing products containing such code) will provide a machine-readable copy of the corresponding GPL source code on a CD-ROM via email or traditional mail. A nominal fee may be charged to cover shipping and material costs, as permitted by the GPL. This offer is valid for at least three years.
For GPL inquiries or requests for a GPL CD-ROM, please contact GPL@tp-link.com or write to:
Suite 901, New East Ocean Centre, Tsim Sha Tsui, Hong Kong
Additionally, TP-Link provides a GPL Code Center at: https://www.tp-link.com/support/gpl/
Here, you can freely download the GPL source code used in TP-Link products.
The GPL code in this product is provided WITHOUT ANY WARRANTY and is subject to copyright by one or more authors.
For more details on the GNU General Public License, please visit:
https://static.tp-link.com/resources/document/GPL%20License%20Terms.pdf
Explanation of Symbols on the Product Label
| Symbol | Explanation of Symbols |
|---|---|
 | DC voltage |
 | AC voltage |
 | Class II equipment |
 | Polarity of output terminals |
 | Energy efficiency Marking |
 | Indoor use only |
 | Caution |
 | Operator’s manual |
| RECYCLING Users are responsible for returning the device to Lounea or its authorized partners for appropriate recycling and disposal. |
The product label is located on the bottom of the device.
Device Recycling and Return
Users are responsible for returning the device to Lounea or its authorized partners for proper recycling and disposal.
If you have any questions, please contact our customer service via phone, email, or contact form.
Phone: 0800 30300
Monday – Friday 8–18, Saturday 10–16 (Free of charge)
Email: asiakaspalvelu@lounea.fi